Insta360 Sphere Review
The Insta360 Sphere is a new attempt at an old idea, a 360 camera with lenses on the top and bottom to make the drone “disappear” in the parallax after stitching the footage. The Sphere is custom made for the DJI Mavic Air 2 or Air 2S. Although this design is convenient when it comes to post production, considering there’s no drone to remove, it also has many drawbacks. Having the stitching line on the horizon means it’s in an area where most viewers will easily notice it. Previous attempts at cameras like this have been plagued with horrible rolling shutter jello that made seamless 360 stitching very difficult.
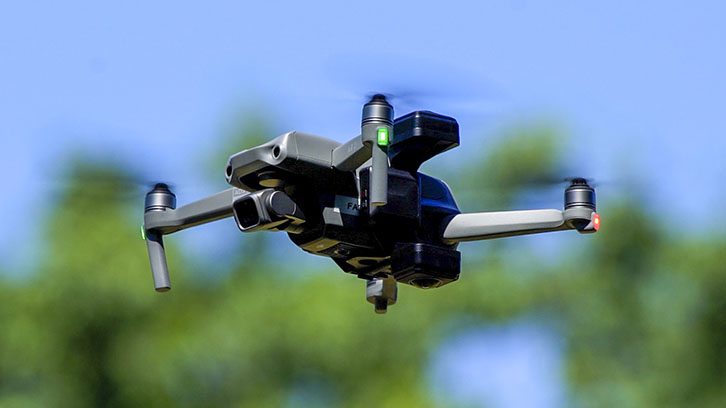
The predecessor to the Sphere, the One R Aerial Edition made for the Mavic Pro and Pro 2, also interrupted the drone’s GPS and many users were not comfortable flying in ATTI mode. Insta360 has attempted to solve many of those problems with this new product, but have they succeeded? We put it to the test to find out.
Setup and Installation
The camera comes with 1 battery, lens caps, lens guards and a decent sized landing pad. The lens guards can cause problems with image quality, stitching issues, and excess sun glare. You might use them for your first few flights while you practice landing and taking off, but I don’t recommend having them attached for any footage you actually want to use.
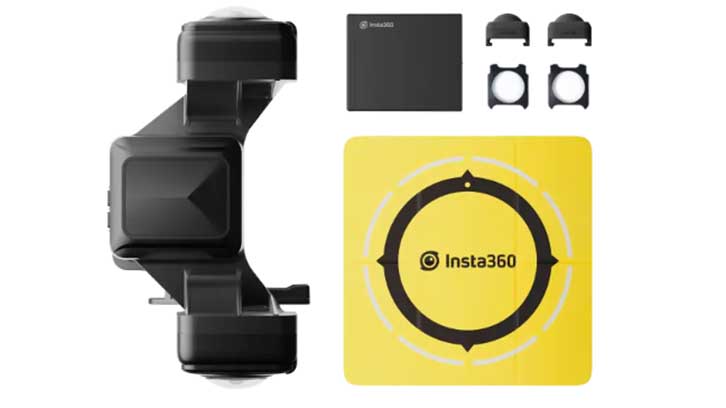
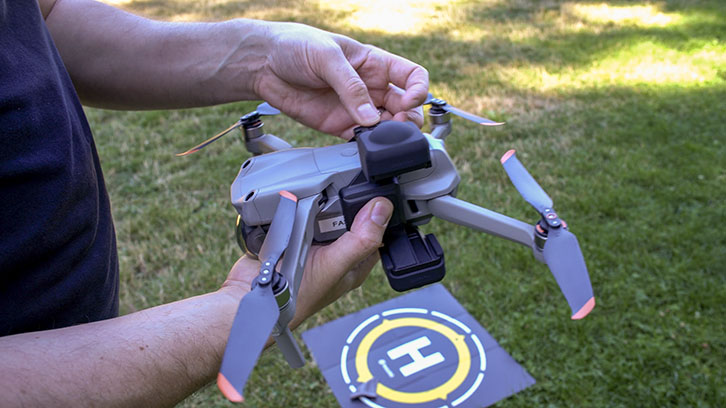
Installing the camera on the DJI Air 2S is easy, there’s really only one way for it to fit. The battery is the same dimensions as the one used for the Insta360 One X, although the specifications on the battery that ships with the Sphere has a higher milliamp rating. The memory card slot is a bit difficult to reach, and it can also be very hard to get the card to stay in without popping back out. Before using a memory card in the air, I would suggest trying a recording at full resolution on the ground so that you can make sure the card has efficient write speed. I wasted an entire battery on a test flight only to realize the Sphere had not continued recording, even though it’s indicator light was still blinking red.
Battery life is about 50 minutes while recording 5.7K video, and your drone’s battery life may impact flight time by about 20% considering the extra weight of the camera attachment.
Connecting with the app was quick and painless with my Samsung Galaxy S21. The app is required to change camera settings, considering there is no display screen or interface on the camera itself. You can use the app to start/stop recording, change recording modes, set ISO, shutter, and white balance.
360 Photo Mode
Taking 360 photos with the Sphere can be difficult considering you will lose your WiFi connection to the camera as soon as you fly out of range, so you can’t use the shutter button in the app. Some users work around this problem by using the interval mode and just let the camera snap away.
But why bother? The onboard camera on the Air 2 or Air 2S is superior in every way. The Insta360 Sphere will only take panoramas up to 6080x3040, a bare minimum for 360 photos considering most platforms can support 2-3x that resolution. Compare that to the whopping 24,000x16,000 pixels that the DJI Air 2S will get in a 360 pano and it’s no contest. The only drawback is that you’ll have to paint the sky back in. The drone camera won’t get an unobstructed view of the sky, that pesky drone is in the way.
So if you just want to use it for those situations where a lot is going on above the drone, or maybe you are just lazy and don’t want to learn how to properly stitch panoramic photos, you might find a use for photo mode on the Sphere.
Photos can be taken in JPEG, JPEG + DNG, or Pureshot - Insta’s in-app HDR. As previously mentioned, an interval mode is available that may be helpful for getting photos while you are unable to trigger the camera, burst mode is available too as well as night shot. If you are using Night Shot in the US, you are probably breaking the law by flying after civil twilight without a strobe. The camera is horrible at low light anyway. As expected, there’s also a self-timer allowing from 3 seconds up to 60 seconds, so you can pose your friends for your dronies.
360 Video Mode
The maximum supported 360 stitched resolution is 5760x2880. In 2022, that’s not very exciting. 8K would have been nice, especially considering many people use this camera for reframing. Here’s the break-down of video modes:
- 5760x2880 at 30fps
- 3840x1920 at 50 or 30fps
- 3008x1504 at 100fps
The high fps modes are nice to have, although they are pretty much worthless considering how low resolution they are. Consider that a typical FOV for a VR headset or a reframed video might be around a 90 degree slice of that 3008x1504 video, the end user is seeing a video that is not even 1280x720. But it’s only for mobile devices, you say? The average smartphone screen resolution is 1920x1080.
Other video modes are also available such as timelapse & HDR. A timelapse might not produce the best results on a moving drone, the Air 2 and Air 2S have a pretty impressive hyperlapse mode of their own where the drone actually stops to take each picture. HDR video causes more problems than it's worth due to nasty artifacts, more often than not, but sometimes people get lucky with it.
Stitching, Rolling Shutter & Image Quality
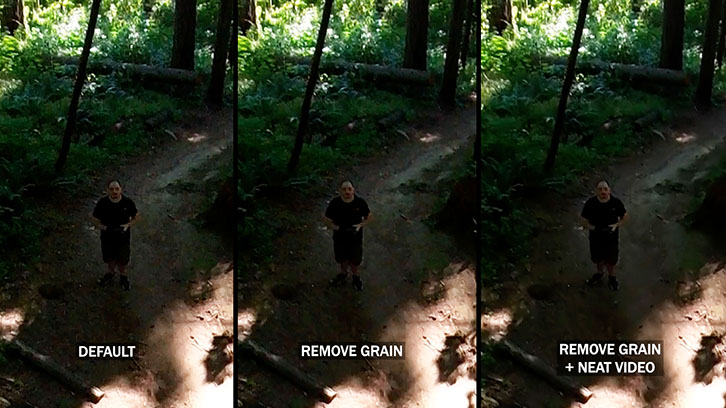
The noise (grain, not audio) on this camera is downright chunky. We have found it to be considerably bad even in broad daylight with low ISO. The culprit could be that the footage is simply overprocessed and oversharpened in camera. Unfortunately, there’s no option to adjust sharpening. Reframers editing on their cell phone probably don’t really notice or care, but those of us making 360 videos for VR headsets will find this very obvious. Insta360 Studio has a grain removal option on export that seems to get rid of some of it, but you may still want to pass your footage through your noise reduction plugin of choice, like Neat Video or Topaz.
In some of our early shots we noticed a flicker or shadow from the back rotors showing up on the stitch. However, after an update came out for Insta360 Studio, this problem has been less frequent so I think they may have worked to fix that issue.
Rolling shutter “jello” is still very prominent with this camera, despite what some positive reviewers have reported. It’s definitely still there. It’s not really a surprise, any camera with this much parallax is going to have a lot of stitching challenges, especially while mounted to a drone that is moving and vibrating. The stitching seems to work best when you move your drone at a consistent low-medium speed. Starting and stopping will yield some pretty nasty stitching artifacts.
Settings & Manual Control
Insta360 Sphere allows you to dial in the shutter, ISO and white balance manually. Shutter allows speeds from 1/30 up to 1/8000 in video mode and up to 120 second long exposures in photo mode. ISO ranges can go from 100 up to 3200, or you can also set a MAX ISO to not exceed, allowing the camera to still make auto adjustments within that limitation. White balance allows you to set a custom kelvin from 2700K up to 6500K. While in auto mode, exposure compensation can be set from -4 up to +4. In a lot of scenarios, the camera will tend to blow out highlights, so we find ourselves using -0.5 or -1.0 frequently.
A histogram can also be displayed within the app. Formatting your card is a bit of a scavenger hunt. You’ll have to back out to the main screen of the app, go to settings, camera settings, other settings, then into camera storage. You’ll find the gyro calibration option there as well.
Color modes allow vivid, standard, and LOG. The LOG mode is fairly useless considering this is an 8bit camera with an action cam sensor, you don’t gain a whole lot of range by using LOG. I avoid Vivid color mode, considering I don’t want to “bake in” that much saturation, I prefer to add that in post.
GPS Interference
Insta360’s website claims that the camera will not impact the drone’s GPS performance, but that doesn’t seem to be true for us. We had significant GPS interference with all of our tests. Out in the open, we will typically acquire 18-25 satellites in our area, with the Insta360 Sphere attached, we only get up to 12. In a wooded area with obstructions to the sky, we typically get from 12-15 satellites. With the Insta360 Sphere in that same wooded area, we’ll get from 0 to 5. The GPS interference only seems to happen when the camera is powered on and recording, so we can rule out a physical obstruction.
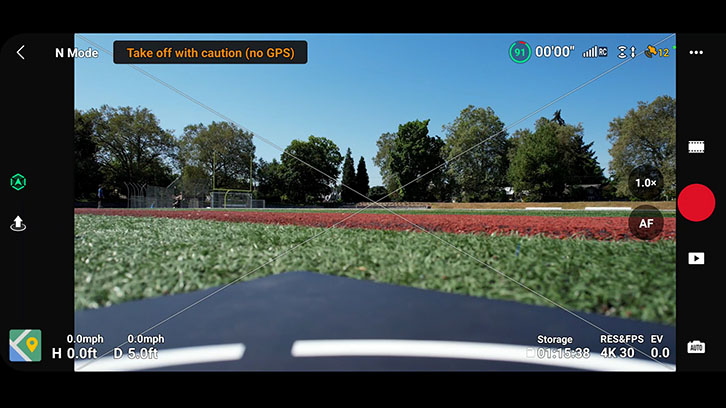
You can certainly fly without a solid GPS lock, but this can affect the overall stability of the flight. The drone can sometimes drift in a direction you did not intend. You also can’t use features like return to home, you can’t track your location on a map, and some intelligent flight modes will not work when you don’t have a position lock.
The reason we bought this camera was to fly it in compromising locations where the sky may be obstructed by trees or buildings. It’s the whole point of a product like this, otherwise I’d just fly with a better 360 camera under the drone and do an easy sky replacement. However, due to the GPS interference this makes it much more dangerous to fly in those places. Imagine chasing rally cars down dirt tracks through the forest, flying under a dense redwood canopy to create an amazing “cable cam” like shot, or chasing awesome mountain biking jumps in mid air. They are all made more risky by not having a solid GPS lock.
Flying the Sphere
GPS issues aside, the Air 2S is certainly more maneuverable than it would be with a 360 camera hanging under the drone. A lot of people use custom 3D printed mounts to fly cameras like the Insta360 One X, GoPro MAX, or even Qoocam 8K under small drones like the Air 2S or Mavic Pro 2. This can be very dangerous considering it adds a significant amount of weight under the drone, and can cause the drone to spin like a pendulum out of control when you descend, stop suddenly, or start too quickly. When using the Sphere, I am much more confident to go faster and try maneuvers I would never attempt with a 360 camera under the drone. If the GPS were not impeded, it would be damn near invincible.
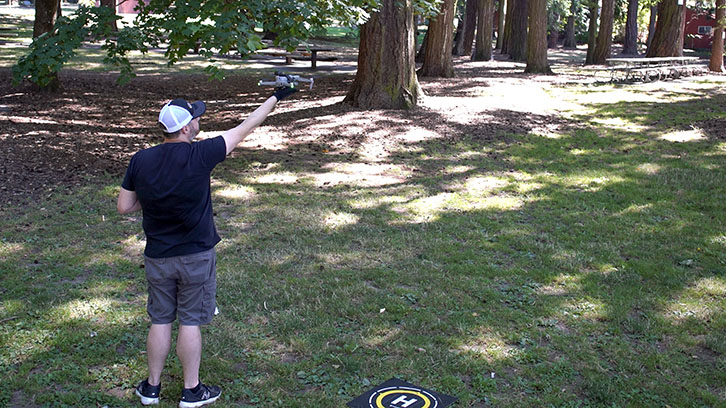
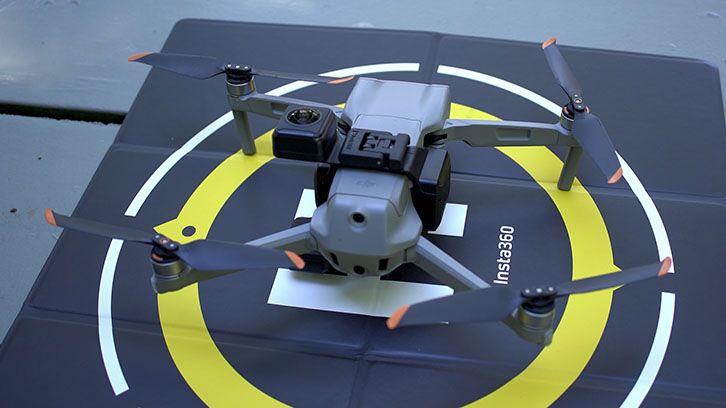
Because the bottom lens extends past the landing legs and rotors, when you place the drone on a flat surface it’ll be resting directly on the bottom lens. This is why Insta360 provided a landing pad with the product. Personally, I prefer to hand-launch and catch the Air 2S. If you haven’t practiced doing this before, I would recommend trying without the sphere installed first. Eye protection and gloves are also a good idea. It’s always better to hold out your hand out flat and bring the drone down to it, rather than reaching for it. The downward sensors may detect your hand and move up on the first few tries, but eventually it will land if you continue to throttle down.
Post Production & Exporting
You can export and process your footage from the Insta360 Sphere in Insta’s own stitching software, Insta360 Studio. The mobile apps will be convenient for sharing social media content on the go, but we prefer to use the desktop version of the app for any serious work considering we can take advantage of fast render times at maximum quality.
Export allows reframed content at several aspect ratios, and full 2:1 360 video exports up to 5760x2880 resolution. H.265, H.265 and Prores 422 options are available. We’d also recommend using “remove grain” to clean up a bit of the digital noise. Beyond this, we often find that the footage needs additional noise reduction.
There is one really unfortunate drawback for users who want to export directly from apps to video sites and social media, the audio cannot be turned off. This means that buzzing drone sound will be baked into your footage. The only way around this is to edit in 3rd party software and mute the audio track, or use features offered by YouTube that allow you to replace the audio. A toggle to be able to disable the audio would be nice, considering it’s useless.
Conclusion
To sum it up, the Insta360 Sphere seems to be on par with most popular consumer grade 360 cameras such as the GoPro Max or the Insta360 One X2. Both of those cameras are also popular choices to fly on small drones, but the Sphere has the added bonus of “disappearing” the drone.
Whether or not you buy it may come down to your own comfort level flying without stable GPS. Through several test flights, we haven’t had any crashes or near misses, but we did notice some instability and erratic flight behavior. It’s also really unfortunate that you lose a lot of features like return to home, waypoints, and maps when GPS is not locked in.
If full 360 shots are the goal, mounting a camera underneath the drone can still yield better results, especially if you are shooting with a higher quality 360 camera such as a Qoocam 8K or an Insta360 One RS 1-inch 360. Stitching will be better, and these cameras have better sensors. The only caveat is that you have to replace the sky and remove the drone for a full 360 shot, which can sometimes be impossible depending on the location.
If reframing is the goal, if you aren’t doing any seriously wide angle shots or crazy transitions, maybe shooting with the on-board drone camera is a better idea. You’ll have the option of ND filters, a rock solid gimbal, better dynamic range, better resolution, better everything - you just have to point the camera. So many videos shot on Sphere that I have seen could have just as easily been done with the drone’s camera, and would look 10x better. Don’t be afraid to learn to use the great camera you already have.
For 360 Labs, the Insta360 Sphere will be a useful tool for daring attempts at full 360 shots needed in tight spaces where we don’t have much of any other choice. With enough clean-up in post, the footage is acceptable for most projects. Beyond that, we’ll probably stick to other options. For more video examples, be sure to check out our video version of this review on YouTube.
